Due to my ever-increasing storage needs, I have to buy a dedicated equipment for file server. I end up with D-LINK DNS-320L and here is my first look:
Price
It is not cheap. The 2-bay device is around $100. It has no hard drives yet which is I'm still have to seperately buy. Here is the breakdown of the total cost in Philippine Peso:
| Product | Price |
|---|---|
| DLINK DNS-320L 2-Bay Cloud Network | P 4,241.00 |
| 2x Western Digital 500GB Caviar Blue SATA | P 4,285.00 |
| TOTAL | P 8,526.00 |
Location
I had bought this in Octagon, a computer-supplies store located at SM Mall of Asia. I'm a little surprised how hard it is to purchase any sort of NAS devices online that I have to physically walk into these stores to buy one.
Unboxing
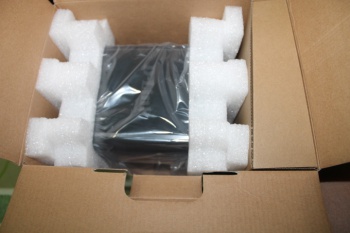 The box is a little bit big for the actual equipment. Mostly filled by styrofoam. They only test the power in the store and not the actual installation and configuration of the NAS device, so make sure you know how to use and configure this thing yourself since the store staff is most likely not familiar either on how to use this product.
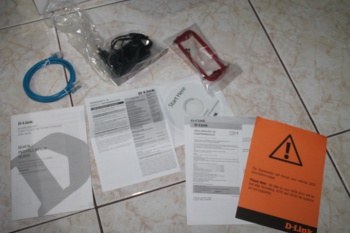 The package comes with a "short" RJ-45 cable which you can use to connect the device to switch hub or router. Power supply cord, brackets for the hard drives and installation manuals (hard copies and a CD)
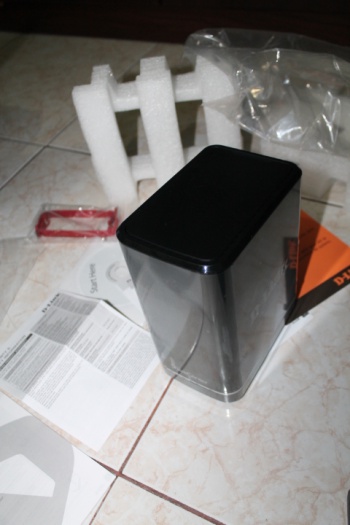 The NAS itself is very light when you grabbed it. Its still covered with some think plastic film to protect it from scratches. It looks like a mini-PC wherein the motherboard is in the floor of the device. Most of the space is for the 2 slots reserved for hard drives.
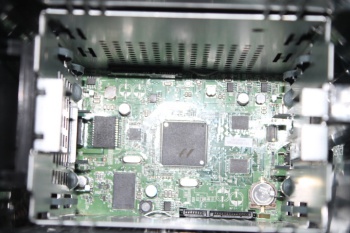
You'll notice at the back that it has small fan that is controlled by the board depending on the temperature. At the botom is the power supply, RJ-45 and USB slots.
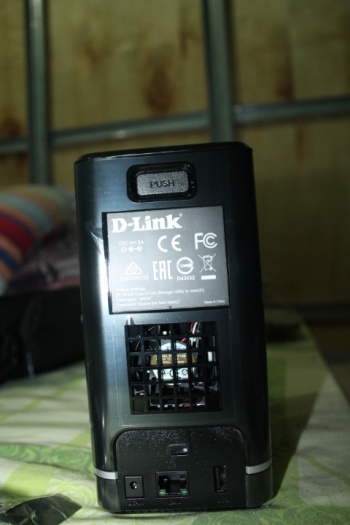
Hard Drive
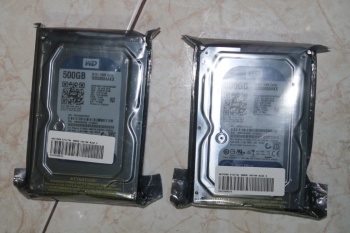 I had some mini-heart attack when I realized that there is such a thing as "compatibility list" of hard drives that this device can take. When I bought the WD Caviar Blue drives, It was just selected randomly being clueless there is such requirements exists. You can find the list of compatible drives here. Luckily for me, the one I picked worked with the device.
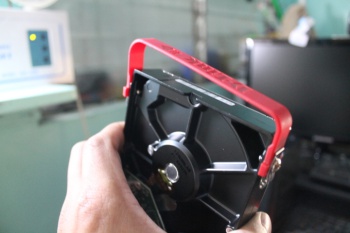 Installation of the hard drives is a little intimidating, determining which part of the red strap thing goes to which side of the hard drive is a little bit tricky. Also inserting the hard drive itself requires a little bit of patience since you cannot actually see if the SATA slots is sliding properly on the bottom of the NAS. There are just some metal guides inside the device which acts as a rail for the drive to slide into and you have to excert some little force to make sure it fully reached the bottom (thus making contact to the SATA port).
 Once you had inserted the two drives, try to plug the power cord on. Press the power button and see if the L and R blue LED lights is blinking. This indicates that the NAS is detecting your drive. If it is not lit, that means it is not detecting the drives and you need to power off the device and try to re-insert it since it might not be seated properly. You might need to double check if the drive model is present in the compatibility list.
Once you had powered on the device, plug in the network cable. You'll need a computer/laptop which is in the same network/LAN to configure the device. Download the application in here It should show some wizard-type tool that will guide you on how to configure the NAS server. One of the most important part is selecting the device in your network
 The IP address displayed in there is the IP assigned by the DHCP server to the NAS device. That will be the hostname you are going to use whenever you are going to access the device over the network (FTP/HTTP/SMB)
Did you find this useful?
I'm always happy to help! You can show your support and appreciation by Buying me a coffee (I love coffee!).